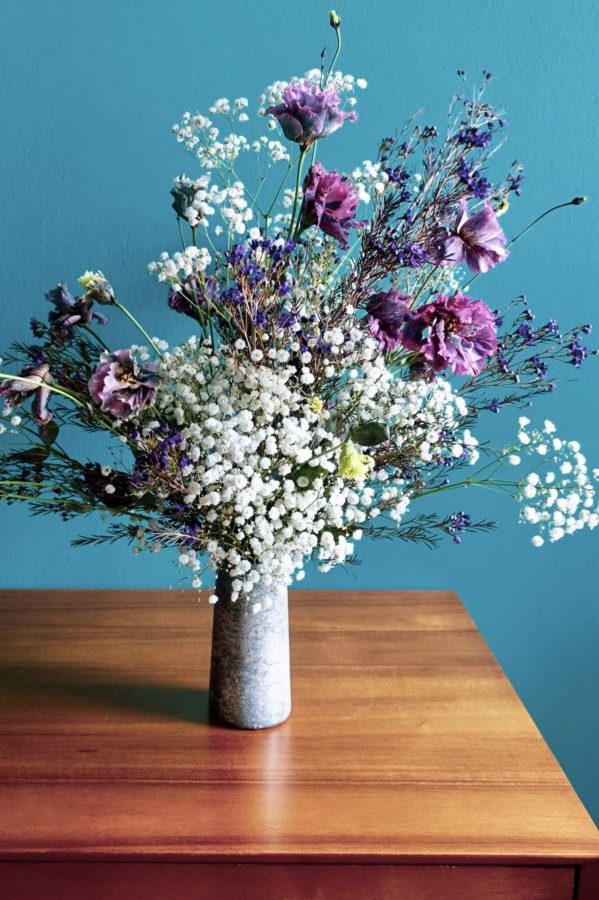
Hello! I am so excited to share this project with you today! This adorable DIY…
Baby’s Breath DIY & Make it Fashion
April 30, 2020
Baby’s breath is popular again!
I wasn’t sure I was excited about this but this fluffy little flower has won me over. I’m shocked. And before you go and discount this little flower with a bad rep hear me out.
Baby’s breath. As a self-respecting floral designer (a fancy name for a florist!) I wouldn’t go near baby’s breath at the beginning of my career. It just was so 70’s & 80’s. Was I afraid that any association with it would make me less of a designer? Perhaps. Not anymore. So many new floral artists are looking to this blacklisted flower to do really beautiful and sculptural installations. So after years of avoiding it, I must admit, I’m falling for baby’s breath. My goal? To convince you that you need it in your life, and to convince you that you have a baby’s breath DIY arrangement in your future!

We were shooting our Christmas card (more on that later) and I thought I need a touch of flowers in my hair. But I didn’t love what we had. Then I saw this whole bunch of baby’s breath just begging for me to use it.
Gypsophilia is another name for baby’s breath.
Many flowers have several different names. Gypsophilia is most commonly known as baby’s breath, but some designers and wholesalers may also call it gyp for short.
Baby’s breath works well for the base! Arrangements & floral sculptures
Gyp not only created the base for this arrangement but also provided the overall shape that I wanted. Another reason why a baby’s breath DIY arrangement is such a good place to start on your flower arranging journey. Then I added some color. This part is a choose your own adventure whatever flower and color speak to you! Here I used purple waxflower (also an under-appreciated flower, IMHO) and I also used some beautiful dyed Lisianthus. But feel free to add another light and airy flower to your arrangement.
Gypsophilia’s meaning in the language of flowers
In Victorian times, flowers were a way to communicate in a subtle and/or secretive way; to express yourself when you otherwise may not be able to. Gypsophilia means undying love, pureness, and reconnection. To learn more about flowers and their meanings, you can find more information here: https://flowerswithemily.com/flower-meanings/
Baby’s breath DIY & make it fashion
Baby's Breath Make it Fashion

Baby's Breath But Make It Fashion. Create a beautiful flower arrangement with Baby's Breath, a flower that hasn't been popular since the 80's... until NOW!
This soft & fluffy small budded flower is the heart of this arrangement. And at her inexpensive price point its yet another reason to rejoice in this new found spotlight! Enjoy designing this soft cloud like arrangement with pops of color yourself. DIY Flower Arranging at its best with gorgeous results! Happy Designing friends. xx
Materials
- White Baby's Breath
- Purple Lisianthus
- Purple Wax Flower
- Vase
- Chicken Wire
Tools
- Floral Clippers
- Wire Cutters
- Watering Can & Water
Instructions
1. Prep Flowers. Unwrap flowers out of plastic sleeves, clean off any unwanted leaves/greenery from stems (you don't ever want any leaves to be under water level).
2. Give stems a fresh cut and place them directly in a bucket/pitcher of clean water.
3. Prep Chicken wire. This will act as your base inside the vase. Cut a rectangle of chicken wire larger than your vase (but not too large). And scrunch it together. This should look like a little roll/ball of chicken wire.
4. Prep Vase, make sure that the vase is clean. And add the chicken wire ball to the vase. A snug fit works best so that it stays put and can be a solid framework for you inside the vase.
5. Add water to the vase, and begin adding flowers.
6. Arrange with the general style & shape of the finished arrangement in mind. Create a low full pocket of Baby's Breath, accented by a few pieces reaching out to the right and left to give the arrangement a bit of reach. Then add some tall Baby's Breath as well. Layer in your show flower, Lisianthus, and then add in additional pops of color in the purple wax flower. For more design tips and tricks, please see the video.
7. Be sure to turn your arrangement around as you design to make sure that she is beautiful on all sides of the arrangement.
Notes
** Baby's Breath is the star of this arrangement. However, if you can't source Lisianthus or Wax flowers many other flowers may be used. Be sure to pick one showy flower, and one small accent flower for best results.
Related Posts
- DIY Flower Paper Garland
- Paper Flower Bouquet
I love flowers! And I love to have a bouquet of them in my house…
- Foraged Twig Wreath
Hi Friends! I’m so excited to share with you today this fun and easy tutorial…