


Hello! I am so excited to share this project with you today! This adorable DIY…
Paper Flower Bouquet
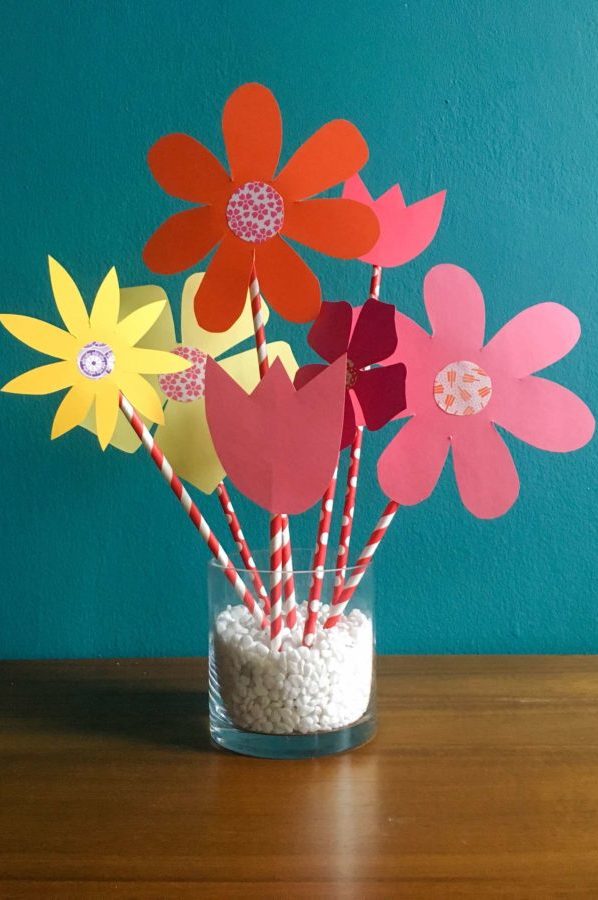
I love flowers! And I love to have a bouquet of them in my house at all times if possible. They bring so much joy and life into my apartment. But since we are trying to be safe and not go out outside besides grabbing the essentials during this global Covid19 pandemic I decided to make a bouquet with what I already had at home…. paper! I’m so pleased with how this paper flower bouquet turned out!
Now although I will always prefer fresh flowers to paper ones, this bouquet turned out so fun! And I only used items that I already had on hand. And look how great it turned out. If I do say so myself, haha!
Here are some tips that I discovered along the way to help you as you create your own.
Tip #1: Gather Inspiration
I’m not a great artist. So I needed to gather some inspiration for my flowers. I love the bold flowers and prints found in Marimekko designs, and decided that I wanted my flowers to be simple and more of a silhouette. Using their big bold design in mind for color and also size and shapes. Inspiration is everywhere. Where do you find inspiration? Next stop, I googled flower silhouettes and picked a couple of my favorites to hand draw. You can pick as many as you’d like! I chose 3 varieties of flowers.
Tip #2: Create Stencils
Knowing that I wanted my bouquet to be nice and full and would make lots of flowers, I created a stencil. That way I can trace lots of flowers easily and quickly. Bonus! I’m planning on giving some away as gifts! For me, the real joy in flowers is sharing them with those we love. Who would you want to gift a bouquet to?
Tip 3#: Create Stems
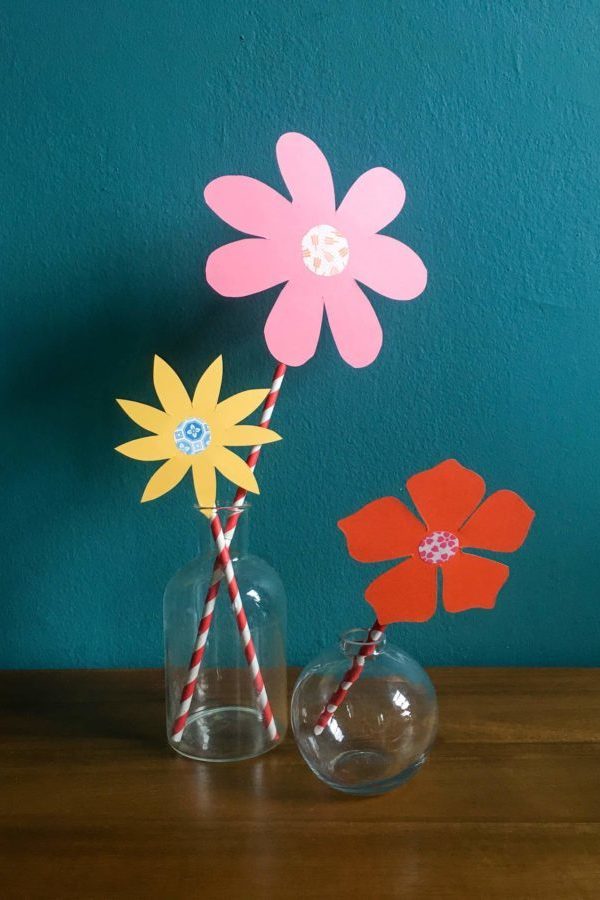
After I created all the flowers, I needed something that I could attach them to so that they would be able to stand up. Here are some ideas to help you get started: twigs, chopsticks, skewers, pipe cleaners, or straws! Straws! I thought that I still had a few straws leftover from a holiday care package that my mom sent my family, so off I went to locate those. So happy to find these happy little paper straws. They worked perfectly as a stem!
Tip #4: Use a vase filler to hold the stems up
Since these are not real flowers, we will not need to fill the vase with water. However, we will need a way to get the flowers to stand up just the way we want them to. A vase filler is perfect for this. You can use any of these items for vase fillers: sand, small rocks, small glass marbles, even dirt!
Tip #5: Share your Bouquet!
Who would you like to share your bouquet with? Someone in your family? A teacher? Or maybe a nurse or a doctor. They are working so hard right now to keep people safe! Or maybe you’d like your paper flower bouquet to sit on the dining room table where everyone in your family can enjoy it!
Below, is my step by step process, and I also have a video that shows my creative process. Please let me know if you have any questions.
Thanks for checking out this fun paper flower tutorial! I hope you have fun designing and being creative!
xoxo
Emily
PS- if you enjoyed this post, you’ll love this project too!
Yield: Several Bouquets
Kid's Edition: Paper Flower Bouquet
Homemade paper flower bouquet
Prep Time
5 minutes
Active Time
35 minutes
Additional Time
5 minutes
Total Time
45 minutes
Difficulty
Easy
Estimated Cost
Free! Use what you have!
Materials
- Cardstock brightly colored
- Patterned Paper
- Paper Straws
- Vase filler, little white rocks
- tape
Tools
- scissors
Instructions
1. Find inspiration for your flowers. You could find inspiration anywhere! Outside, in a book or magazine, and online!
2. Draw your flowers within the circle guide and cut them out. These will be your templates
3. Trace flower templates onto brightly colored paper and try to fit as many flowers onto the sheets as possible
4. Cut out all of your flower shapes
5. Decorate your flowers! I used pattern papers for the middles. But you could use markers, paint, stickers. Use your creativity here!
6. Attach your flowers to stems with tape
7. Clean vase, fill with vase filler (sand, rocks, marbles, or even dirt!)
8. Arrange your paper flowers!
9. Share your bouquet!
Recommended Products
As an Amazon Associate and member of other affiliate programs, I earn from qualifying purchases.