


How to Arrange Dried Flowers Dried flowers are definitely having a moment right now. Chances…
Pressing Flowers Magic
Pressing flowers is magical! I love it when I open a book or a journal that I’ve pressed a flower into and it immediately takes me back to a specific memory. Pressing flowers is fun and easy, and hard not to do right. Most of my life I’ve pressed flowers without any research and still had success.
However, with a little bit more information on the subject, you will be more successful. My mother-in-law had a business of pressing flowers, and I asked her advice. Here are the helpful tips that she shared with me.
Tip #1:Fresh is Best
This tip is pretty simple and may seem obvious, but it’s a good reminder. Pick the flowers or leaves right before you are ready. The fresher the flowers, the more beautiful the end result will be. The fresher the better!
Tip #2: Use a Material that Wicks Moisture Away
My mother in law would place her flowers between blank pages of newsprint. She found that this was the best material to wick away the moisture of the flowers. However, you wouldn’t want to use regular newspaper because the ink of the newspaper will transfer to the flowers. And since I blank newsprint isn’t an item people typically have on hand, we decided that the best material most people have at home to use is paper towels.
Tip 3#: Delicate & Thin Flowers Press the Best!
The thicker your flower, the less likely you are going to get the result that you want. First of all, you will need more weight to press it, and second the larger it is the less likely you are going to get all the moisture out of the petals. For example, if you wanted to press a rose they are pretty thick. Instead, consider pressing the individual petals. You will get a much better result and the petals will dry quickly!
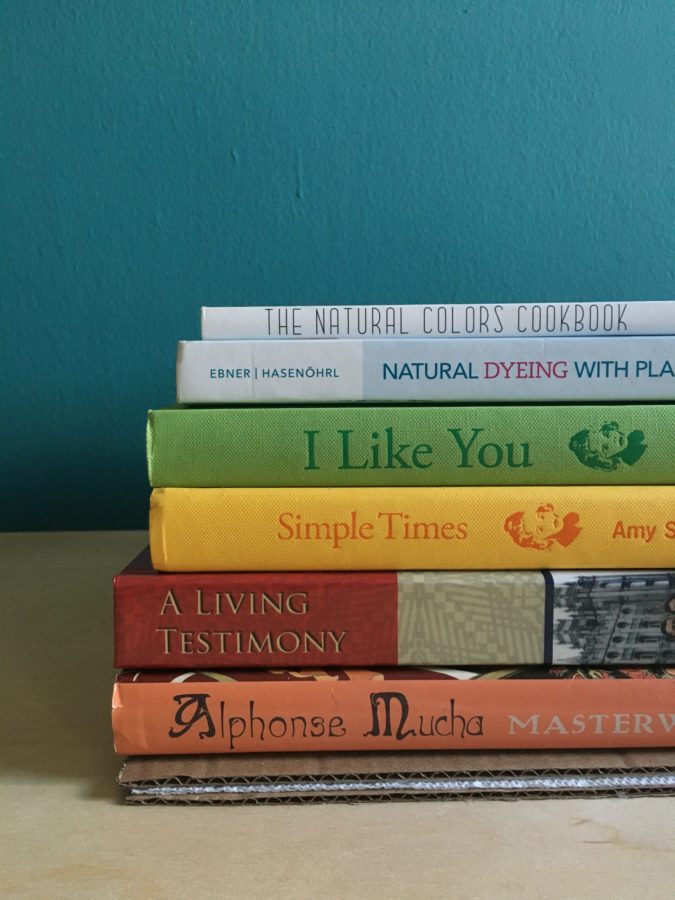
Tip #4: Heavy Books for pressing flowers!
My mother in law used a flower press to apply the pressure to her pressed flowers. But I didn’t have one of those just lying around in my small apartment, haha! So we improvised with the heaviest books I could find! The weight helps to flatten and push the moisture out of the petals!
Tip #5: Wait!
Patience pays off during this process! Pulling the moisture out of the flowers can take at least 4 days and sometimes up to a week! It’s so hard to wait (at least for me!) but you will be so happy you did! A good test is to gently touch the flower, if it feels slightly wet it will need a few more days of drying. But I wouldn’t recommend checking them before day 4, you will just be disappointed.
Create with Pressed flowers!
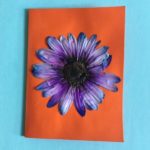
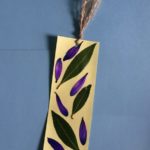
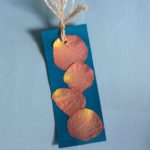
After your flowers are pressed you can create so many easy and fun projects with them! All you need is a little bit of Elmer’s Glue (the liquid one that dries clear) or a bit of Mod Podge. Then you can adhere your flowers to anything your heart desires! The sky is the limit. Check out my step by step guide along with my video below!
Happy Flower Pressing!
xo
Emily
How To Press Flowers

Pressing Flowers is Magical! It is so easy with the tips that I share. And then you can create all kinds of amazing projects with the finished pressed flowers.
Prep Time
5 minutes
Active Time
15 minutes
Additional Time
4 minutes
Total Time
24 minutes
Materials
- Flowers
- Leaves
- Grasses
- Paper Towels
- Cardboard
Tools
- Heavy Books!
- Decoupage, I used Mod Podge
Instructions
- Forage and Gather your flowers, leaves, and grasses to press
- Pick flowers that are the most delicate and thin. If the flower is too thick to press, consider pressing just the petals.
- Pick the flowers and greenery right before pressing. The freshest flowers make the most beautiful pressed flowers
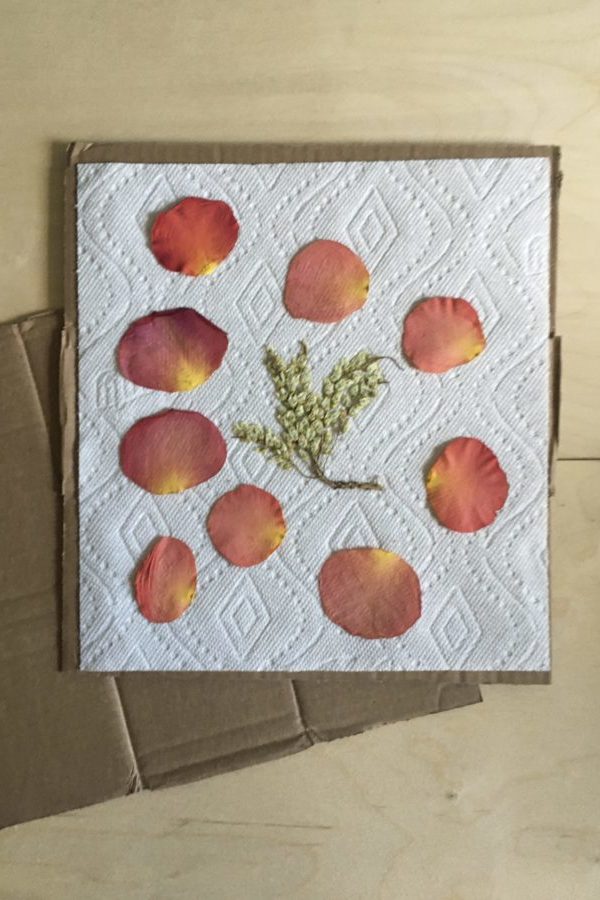
- Place the petals, leaves, and flowers in between two pieces of paper towel. Paper towels will wick the moisture away from the flowers.
- If you have cardboard on hand, I like to place the paper towels between to pieces of flat cardboard. Gives extra support to the flowers being pressed and won't get any flower 'juice' on your books
- Place a stack of heavy books on top of your paper towel and cardboard
- Wait, at least 4 days before you check on your flowers. It could take up to 7 days to be completely dry. Gently place your finger on the flower, if it feels wet it isn't dry yet.
- Gently remove flowers when dry from paper towel. You may need to use a pair of tweezers to gently pull the flowers of the paper towel.
- Now with a little bit of Elmer's glue (the liquid kind that dries clear) or Mod Podge you can decorate anythign your hear desires with these beautiful pressed flowers
- Create and have fun!
Recommended Products
As an Amazon Associate and member of other affiliate programs, I earn from qualifying purchases.